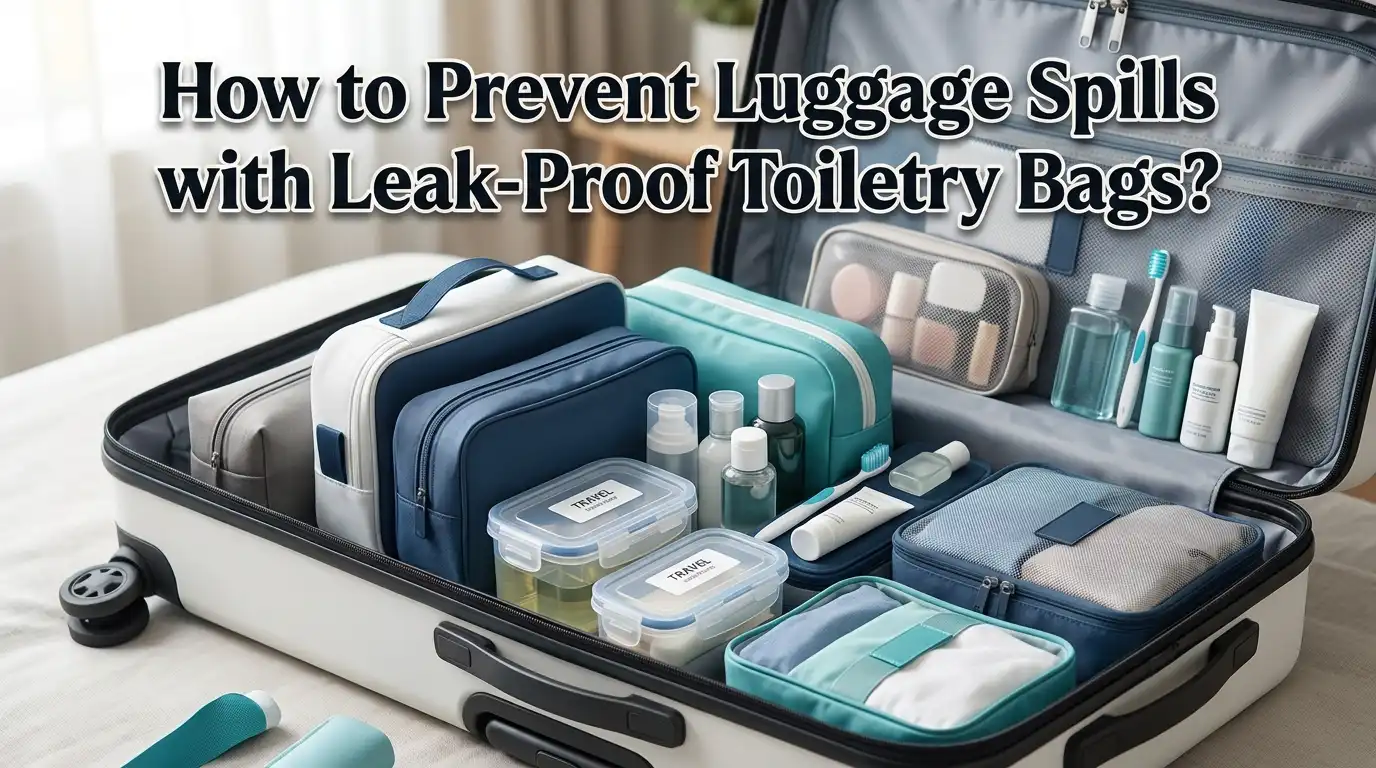
How to Prevent Luggage Spills with Leak Proof Toiletry Bags?
You open your suitcase after a long flight, and there it is. Your favorite shampoo has leaked all over your clothes. Your lotion has coated your electronics. That expensive serum you packed is now a sticky mess on everything you own.
The culprit is often a combination of air pressure changes during flights, rough luggage handling, and poorly sealed containers. But the good news is that this problem is entirely preventable.
This guide walks you through every practical solution to stop toiletry leaks before they happen. You will learn why your bottles leak in the first place, how to choose the right leak proof toiletry bag, and which packing tricks seasoned travelers swear by.
Key Takeaways
- Air pressure changes during flights cause sealed bottles to expand, pushing liquid through weak seals and caps. This is the number one reason toiletries leak during air travel. Removing excess air from bottles before packing reduces this pressure buildup significantly.
- The plastic wrap trick is the simplest and most effective hack. Place a small square of plastic wrap over the opening of each bottle before screwing the cap back on. This creates a secondary seal that blocks leaks even under pressure changes.
- A quality leak proof toiletry bag acts as your last line of defense. Look for bags with waterproof linings made from TPU, PVC, or silicone. These materials contain spills inside the bag so your luggage stays clean even if a bottle fails.
- Solid toiletry alternatives eliminate the risk entirely. Shampoo bars, soap sheets, toothpaste tablets, and solid deodorants do not leak. They also save space and comply with carry on liquid rules without counting against your quart size bag limit.
- Packing position matters more than most travelers realize. Always place your toiletry bag upright in your luggage and surround it with soft items like clothing. Avoid placing heavy objects on top of bottles.
- Layered protection gives the best results. Combine leak proof containers, the plastic wrap method, individual zip bags for high risk items, and a waterproof toiletry bag for maximum protection against spills.
Why Do Toiletries Leak During Travel
Understanding why your bottles leak is the first step to preventing spills. The primary cause during air travel is cabin pressure. Commercial aircraft cabins are pressurized to the equivalent of about 6,000 to 8,000 feet above sea level. This is significantly lower than ground level pressure.
When a sealed bottle goes from ground level to a lower pressure environment, the air trapped inside the bottle expands. This expansion pushes against the liquid and the container walls. If the cap or seal has even a tiny gap, the expanding air forces liquid out through that gap. This is the same reason your ears pop during takeoff and landing.
The problem gets worse with bottles that are only partially full. A half empty shampoo bottle has a large air pocket inside. That air pocket expands more dramatically under lower pressure, creating stronger force against the seal. Bottles that are nearly full or completely full leak less because there is less air inside to expand.
Rough handling is another major factor. Baggage handlers toss, stack, and compress luggage during transit. A bottle resting on its side or upside down puts constant pressure on the cap. Combine this with vibrations from conveyor belts and vehicle transport, and even secure caps can work loose over time.
Temperature changes also play a role. Moving from a cold environment to a warm one can cause liquids to expand slightly and create additional internal pressure. All these forces working together make toiletry leaks almost inevitable without proper prevention.
How Air Pressure Affects Your Packed Liquids
Air pressure changes deserve a deeper look because they are the biggest threat to your packed liquids. At cruising altitude, the cabin pressure is roughly 75% of sea level pressure. This 25% difference is enough to turn a properly sealed bottle into a leaking disaster.
Think of it like squeezing a bottle from the inside. The trapped air pushes outward in every direction. It pushes against the walls of the container, the bottom, and most importantly, the cap. Caps and lids are almost always the weakest point on any container. Screw caps can have tiny gaps between the threads. Flip top caps often have loose hinge mechanisms. Pump dispensers have openings that are impossible to seal completely.
The cargo hold of a plane has even lower pressure than the cabin. If your checked luggage sits in an unpressurized section, the pressure difference can be even more extreme. This is why checked bags often have worse leak problems than carry on bags.
There is a simple physics test you can try. Seal a partially empty water bottle at ground level and take it on a plane. You will notice the bottle swelling and becoming rigid during flight. The same thing happens to every sealed container in your luggage. The practical solution is to minimize the amount of air in each container. Squeeze out excess air from flexible bottles before sealing them. Fill rigid bottles as close to the top as possible. This single step reduces leak risk dramatically.
Pros of understanding pressure effects: You can take targeted action to prevent leaks. Cons: You cannot eliminate pressure changes entirely, so additional precautions are still necessary.
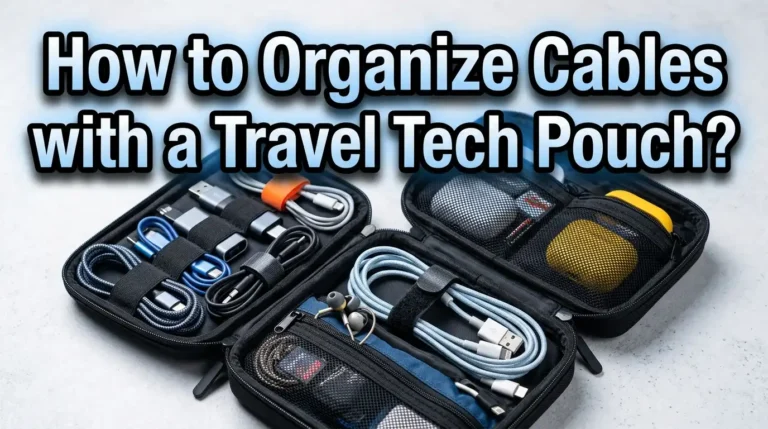
Choosing the Right Leak Proof Toiletry Bag
Your toiletry bag is your primary barrier between potential spills and the rest of your luggage. Choosing the right one makes a significant difference. The ideal leak proof toiletry bag should have a waterproof lining, a reliable closure system, and enough structure to hold bottles upright.
The most common materials for leak proof toiletry bags include TPU (thermoplastic polyurethane), PVC (polyvinyl chloride), and silicone. TPU is lightweight, flexible, and fully waterproof. PVC is durable and easy to clean. Silicone bags are reusable, heat resistant, and provide excellent seals.
Look for bags with sealed seams rather than stitched seams. Stitching creates tiny holes where liquid can seep through. Welded or heat sealed seams eliminate this problem entirely. The closure mechanism matters too. Zip lock style closures provide reliable seals. Zippers with water resistant coatings add extra protection.
Clear bags serve a dual purpose. They let you see the contents quickly and comply with TSA carry on requirements. The TSA 3-1-1 rule requires that all carry on liquids, gels, and aerosols be in containers of 3.4 ounces or less, packed in one clear quart size resealable bag per passenger.
Pros of dedicated leak proof bags: They contain spills effectively, meet airline requirements, and keep toiletries organized. Cons: Quality waterproof bags may cost more than basic zip bags, and rigid bags can take up more space in your luggage.
Size matters as well. Choose a bag that fits your needs without excess room. Too much empty space allows bottles to shift and collide during transit.
The Plastic Wrap Method That Stops Leaks Instantly
This is the single most popular leak prevention hack among frequent travelers. It works on virtually every type of bottle, and it costs almost nothing. The method is straightforward and takes less than a minute per bottle.
Here is how it works. Take a small square of plastic wrap (also called cling wrap or saran wrap). Remove the cap from your bottle. Place the plastic wrap flat over the opening of the bottle. Screw the cap back on over the plastic wrap. The cap compresses the plastic wrap against the opening, creating an airtight secondary seal.
This method works because it eliminates the tiny gaps between the cap threads and the bottle opening. Even well made caps have microscopic spaces where liquid can escape under pressure. The plastic wrap fills those gaps completely.
You can use this technique on screw top bottles, flip top caps, pump dispensers, and squeeze tubes. For flip top caps, cover the entire spout area before snapping the cap shut. For pump bottles, push the pump down to the locked position first, then wrap the pump head in plastic wrap and secure it with a small rubber band.
Pros: Extremely cheap, easy to do, effective on almost all container types, and adds zero weight to your luggage. Cons: The plastic wrap can be difficult to work with if your hands are wet, and it creates single use waste. Some travelers prefer reusable silicone caps or covers as a more sustainable alternative.
This method is especially useful for bottles you already own and do not want to replace with specialty travel containers.
Using Silicone Bottle Covers and Leak Locks
Silicone bottle covers are a reusable alternative to plastic wrap. These stretchy sleeves fit over the tops of bottles and create a tight, waterproof seal. They are made from food grade silicone and can be washed and reused hundreds of times.
Leak lock sleeves work on a simple principle. The elastic silicone stretches over the cap and bottle neck, holding the cap firmly in place and covering any gaps. The material itself is waterproof, so even if the cap loosens slightly, the silicone cover prevents liquid from escaping.
These covers come in various sizes to fit travel size bottles and full size containers. They are especially useful for bottles with flip top caps or pump mechanisms that are difficult to seal with plastic wrap alone. Some designs cover the entire top half of a bottle, providing maximum protection.
Another option is silicone stretch lids, commonly sold for covering food containers. These inexpensive kitchen items can double as bottle covers. Simply stretch one over the top of a bottle for a snug, waterproof seal.
Pros: Reusable and eco friendly, effective on many bottle types, lightweight, and easy to pack. Cons: They may not fit every bottle shape perfectly, they add a small amount of bulk, and they can slip off if not sized correctly.
For the best results, choose covers that are slightly smaller than your bottle diameter. The stretch of the silicone should create tension, which is what holds the cover in place and maintains the seal. Always test the fit at home before packing for a trip.
Transfer Liquids to Dedicated Travel Containers
One of the most reliable ways to prevent leaks is to transfer your toiletries from their original packaging into purpose built travel containers. Original packaging is often designed for shelf appeal, not for surviving the rigors of travel. Travel containers are built specifically to withstand pressure changes and rough handling.
Look for travel bottles with wide mouths for easy filling and narrow dispensing openings for controlled use. Silicone travel bottles are popular because they are squeezable, durable, and naturally resist cracking. Hard plastic bottles with screw on caps and rubber gaskets offer the tightest seals.
The key feature to look for is a gasket or o ring inside the cap. This small rubber ring creates a compression seal that blocks liquid from passing through the threads. Standard bottle caps lack this feature, which is why they leak so easily.
When filling travel containers, leave a small amount of space at the top. This might sound contradictory to the earlier advice about reducing air. The goal is balance. You want minimal air, but you also need a tiny bit of space so the liquid has room to expand without bursting the container. About 90% full is the sweet spot.
Pros: Purpose built containers offer the best seal technology, they standardize your packing, and they comply with TSA size requirements. Cons: You need to spend time transferring products before each trip, and some products (like thick creams or serums) can be difficult to transfer without waste.
Label each container clearly with a permanent marker or printed label so you do not confuse your products at your destination.
Solid Toiletry Alternatives That Eliminate Leak Risk Entirely
The most foolproof way to prevent toiletry spills is to remove liquids from the equation entirely. Solid toiletry alternatives have grown rapidly in popularity over the past several years. These products perform the same function as their liquid counterparts but come in bar, tablet, or sheet form.
Shampoo bars are one of the most widely available solid alternatives. They lather and clean exactly like liquid shampoo but weigh less and last longer. A single shampoo bar can last the equivalent of two or three bottles of liquid shampoo. Conditioner bars are also available and work the same way.
Toothpaste tablets are another excellent swap. You simply chew a tablet and brush with a wet toothbrush. They take up almost no space and will never leak inside your bag. Soap sheets dissolve on contact with water and replace liquid hand soap or body wash.
Solid deodorant sticks, solid sunscreen sticks, and solid perfume balms round out the options. Even solid lotion bars exist. You warm the bar between your hands and apply the melted product to your skin.
Pros: Zero leak risk, no TSA liquid limits to worry about, lighter weight, compact size, and many options are eco friendly with minimal packaging. Cons: Some solid products may not perform as well as their liquid versions for certain hair or skin types, they can be more expensive per use, and they require a drying container to prevent them from getting mushy between uses.
Carrying a small tin or silicone case for your bars keeps them dry and separate from other items in your bag.
How to Pack Your Toiletry Bag Inside Your Luggage
Where and how you place your toiletry bag inside your suitcase matters just as much as the bag itself. Poor placement leads to crushed bottles, shifted caps, and avoidable spills. Strategic packing can cut your leak risk significantly.
Always place your toiletry bag in the center of your suitcase, surrounded by soft items like clothing. This creates a cushion that absorbs impacts from all directions. Avoid placing the bag along the edges or walls of the suitcase where it receives the most force during handling.
Keep bottles upright whenever possible. Gravity is simple but powerful. A bottle sitting upright with the cap on top will naturally resist leaking because the liquid settles at the bottom away from the seal. A bottle on its side or upside down puts constant pressure on the cap.
Use your clothing as padding strategically. Roll soft items like t shirts and underwear and place them around the toiletry bag as buffers. This technique also prevents the bag from sliding around inside the suitcase during transport.
For checked luggage, consider placing your toiletry bag inside a secondary plastic bag. A simple gallon size zip bag provides a second containment layer. If a bottle does leak, the spill stays inside the zip bag instead of spreading through your suitcase.
Pros of strategic placement: No extra cost, reduces physical damage to containers, and minimizes the effect of gravity on caps and seals. Cons: Requires thoughtful packing each time, and may limit your organizational preferences for the rest of your luggage.
Never place heavy items like shoes or books directly on top of your toiletry bag. The weight can crush flexible bottles or pop caps loose.
The Double Bag Strategy for High Risk Items
Some toiletry items are more prone to leaking than others. Products with pump dispensers, flip top caps, or squeeze tube openings carry higher risk. For these items, a double bag strategy provides the best protection.
The concept is simple. Place each high risk item in its own individual zip bag before putting it inside your main toiletry bag. This creates two layers of containment. If the bottle leaks, the individual bag catches the spill. If the individual bag also fails, the main toiletry bag contains the mess.
This approach is especially important for items like facial oils, liquid foundations, and contact lens solution. These products can cause serious damage to clothing and electronics if they leak. A few drops of facial oil on a silk blouse can create a permanent stain.
For extra protection on critical items, wrap the bottle in a small microfiber cloth before placing it in the individual bag. The cloth absorbs any minor leaks and also provides cushioning. You can then use that same cloth as a washcloth at your destination, so it serves double duty.
Pros: Maximum spill protection, inexpensive to implement, and isolates any leak to a single item. Cons: Takes more time to pack and unpack, uses more plastic bags (though reusable silicone bags are an alternative), and adds slight bulk.
The double bag strategy is the go to method for professional travelers and flight crews who cannot afford to arrive at their destination with damaged belongings. It requires minimal investment and provides maximum peace of mind.
Remove Excess Air from Every Container
This step is often overlooked, but it is one of the most impactful things you can do. Excess air inside your toiletry containers is the fuel that powers leaks during flight. The more air inside a bottle, the more that air expands under lower cabin pressure, and the more force pushes against the seal.
Before packing, pick up each bottle and squeeze it gently. If you hear air rushing out or feel the bottle compressing easily, there is too much air inside. For flexible bottles and tubes, squeeze the container until the product rises to the opening, then seal the cap tightly while keeping the bottle compressed.
For rigid bottles that you cannot squeeze, fill them as close to the top as possible. If a rigid bottle is only half full, the large air pocket inside becomes a significant leak risk at altitude. Consider transferring the product to a smaller container that you can fill more completely.
Zip bags used as secondary containment also benefit from air removal. After placing a bottle inside a zip bag, press out as much air as possible before sealing the bag. This reduces the pressure differential inside the bag and also saves space in your luggage.
Pros: Costs nothing, takes only a few seconds per item, and dramatically reduces leak risk. Cons: Can be messy if you squeeze too hard and push product out of the opening. Work over a sink when doing this to avoid spills at home.
This technique combined with the plastic wrap method creates an extremely effective two step protection system that prevents the vast majority of in flight toiletry leaks.
Tape and Rubber Band Techniques for Extra Security
For travelers who want belt and suspenders protection, tape and rubber bands provide additional physical security for bottle caps and closures. These low tech solutions add a mechanical lock that prevents caps from unscrewing during transit.
Electrical tape works best for this purpose. Wrap a strip of electrical tape around the junction where the cap meets the bottle. Make two or three passes to create a firm hold. Electrical tape stretches slightly, which allows it to conform to the bottle shape and maintain tension even if the cap loosens.
For pump dispensers, push the pump down to the locked position and wrap tape around the pump head and the bottle neck. This prevents the pump from being accidentally pressed by other items in your bag. You can also place a small rubber band around the pump neck to keep it pressed down.
Flip top caps benefit from a simple rubber band wrapped over the cap and around the bottle. This creates resistance that prevents the cap from popping open under pressure. Use a thick rubber band for best results.
Pros: Very inexpensive, adds strong physical security, and works on almost any container type. Cons: Tape leaves residue on bottles, takes time to apply and remove, and rubber bands can break if stretched too thin.
Keep a small roll of tape and a few rubber bands in your toiletry bag at all times. They weigh almost nothing and can save you from a disaster. These methods work best as a supplement to other techniques like plastic wrap and leak proof bags.
TSA Rules You Need to Know About Packing Liquids
Understanding airline and security rules helps you pack smarter and avoid problems at the checkpoint. The TSA 3-1-1 rule still applies to carry on luggage. Each passenger can bring liquids, gels, aerosols, creams, and pastes in containers no larger than 3.4 ounces (100 milliliters) each.
All containers must fit inside one clear, quart size, resealable bag. Each passenger is allowed one such bag. This bag must be removed from your carry on and placed in a bin for X ray screening at the security checkpoint.
Checked luggage does not have the same size restrictions. You can pack full size bottles of shampoo, conditioner, lotion, and other liquids in your checked bags. However, FAA regulations limit individual containers of flammable liquids (like alcohol based products) to 18 ounces in checked bags.
The quart size bag itself can function as your leak proof toiletry bag for carry on travel. Choose a heavy duty, zip top bag with a reliable seal. Thin sandwich bags tear easily and provide poor spill protection. Freezer grade bags are thicker and more durable.
Pros of following TSA rules precisely: Smooth security screening, no confiscated items, and the clear bag requirement naturally encourages organized packing. Cons: The 3.4 ounce limit can be restrictive for longer trips, requiring you to pack less product or supplement with solid alternatives.
If you travel internationally, check the liquid rules for your destination country. Most follow similar guidelines, but some allow slightly different container sizes or bag dimensions.
Building Your Complete Leak Prevention System
The most effective approach combines multiple strategies into a single, layered system. No single method provides 100% protection on its own. Together, these techniques create a defense system that is extremely difficult for spills to penetrate.
Start with your containers. Use high quality travel bottles with gasket sealed caps. Fill them to about 90% capacity to minimize trapped air. Apply the plastic wrap method under each cap for a secondary seal. Add silicone covers or tape for physical security on high risk items.
Next, address your individual containment. Place each bottle in its own zip bag or reusable silicone bag. Press out excess air before sealing. Group similar items together so a single leak affects only one category.
Then choose your primary toiletry bag. Select a bag with waterproof lining, sealed seams, and a reliable closure. Clear TPU bags work well for carry on travel. Hanging bags with waterproof compartments work well for hotel use.
Finally, pack your toiletry bag in the center of your suitcase surrounded by soft clothing. Keep bottles upright and avoid placing heavy items on top.
Pros of a layered system: Maximum protection against leaks, multiple fail safes if one layer is breached, and organized packing. Cons: Takes more time to prepare, requires investing in quality containers and bags, and adds a few extra steps to your packing routine.
This system has been tested by thousands of frequent travelers. The few extra minutes of preparation save hours of cleanup and the cost of replacing stained clothing and damaged items.
What to Do If a Spill Happens Despite Your Best Efforts
Even with perfect preparation, accidents can still occur. Knowing how to respond quickly minimizes damage. The first step is to isolate the leaked item immediately. Remove it from your bag and place it in a plastic bag or set it on a waterproof surface.
Blot wet clothing with paper towels or a dry cloth. Do not rub, as rubbing can push the product deeper into fabric fibers. For oil based products like serums or facial oils, sprinkle baking soda or cornstarch on the stain. These powders absorb oil and can be brushed off after 15 to 30 minutes.
Rinse water soluble products like shampoo and body wash with cold water as soon as possible. Most water based toiletries wash out easily if treated promptly. Avoid hot water, which can set some stains permanently.
For electronics affected by a spill, power them off immediately and wipe all surfaces with a slightly damp cloth followed by a dry one. Allow the device to dry completely before turning it back on.
Pros of knowing spill response: You can save most affected items if you act quickly, and the peace of mind reduces travel stress. Cons: Quick action is not always possible if you discover the spill at your destination hours after it happened.
Pack a small stain treatment pen or wipe in your luggage for emergencies. These lightweight tools can treat stains on the spot and prevent permanent damage until you can properly launder the garment.
Frequently Asked Questions
Can I use regular zip bags instead of a dedicated leak proof toiletry bag?
Yes, you can use regular zip bags, but they offer limited protection. Standard sandwich bags are thin and tear easily. Freezer grade zip bags are thicker and more durable, making them a better budget option. For carry on travel, the TSA requires a clear, quart size, resealable bag. A high quality freezer bag meets this requirement. However, dedicated leak proof toiletry bags with sealed seams and waterproof linings provide superior protection. They last longer, hold more securely, and contain spills more reliably. For frequent travelers, investing in a proper toiletry bag saves money and stress in the long run.
Why do my toiletries only leak during flights and not during car trips?
The primary difference is air pressure. During car trips, the air pressure remains relatively constant. During flights, the cabin pressure drops significantly compared to ground level. This pressure drop causes trapped air inside your bottles to expand, pushing liquid out through weak seals and caps. Car travel still carries some risk from rough roads, temperature changes, and bottles shifting in your bag. However, the dramatic pressure changes unique to air travel make flights the highest risk scenario for toiletry leaks. Using the air removal and plastic wrap techniques before any trip is a good habit regardless of your transportation method.
Are silicone travel bottles better than hard plastic ones?
Both have advantages. Silicone bottles are flexible, squeezable, and resist cracking. They are easy to fill from the bottom or through wide mouths. They also allow you to squeeze out excess air before sealing. Hard plastic bottles with screw caps and rubber gaskets typically offer tighter seals. They protect their contents better from external pressure and crushing forces. The best choice depends on the product you are storing. Thin liquids like shampoo work well in either type. Thick creams may be easier to dispense from silicone bottles. Many travelers use a combination of both types for different products.
How do I prevent pump bottles from leaking during travel?
Pump bottles are among the most challenging containers to make leak proof. Start by pushing the pump mechanism down to the locked position if the bottle has a locking feature. Place a small piece of plastic wrap over the pump head and secure it with a rubber band. Then place the entire bottle in its own individual zip bag. For extra protection, wrap a strip of electrical tape around the base of the pump where it connects to the bottle. This prevents the pump from being accidentally pressed by other items. If possible, avoid packing pump bottles entirely and transfer the product to a screw top travel container instead.
Do I need a waterproof toiletry bag for checked luggage too?
Absolutely. Checked luggage actually faces greater leak risks than carry on bags. The cargo hold may have lower pressure than the passenger cabin. Checked bags also receive rougher handling from baggage systems. Your luggage may be tossed, stacked under heavy bags, and exposed to temperature extremes on the tarmac. A waterproof toiletry bag in your checked luggage protects your clothes and belongings from any accidental spills. Use the same layered approach: sealed containers, plastic wrap, individual bags, and a waterproof outer bag. This full system is even more important for checked bags than for carry on bags.
Hi, I’m Janica! I’m a travel enthusiast with a passion for finding gear that actually works on the road. After years of overpacking and dealing with gear that didn’t live up to the hype, I started Pack Light to help fellow travelers make smarter choices. I test, compare, and review travel products so you don’t have to waste money on the wrong gear.