How to Organize Tech Accessories for Digital Nomads?
You just landed in a new city. Your laptop is at 5%. You dig through your backpack and find a mess of tangled cables, adapters, and chargers stuffed into every pocket. Sound familiar? If you live and work on the road, this chaos costs you real time and real stress every single day.
Digital nomads carry more tech than the average traveler. Laptops, phones, portable monitors, power banks, earbuds, cables, adapters, and external drives all compete for limited bag space.
This guide gives you practical, step by step solutions to organize every piece of tech you carry. You will learn how to sort, store, protect, and access your gear fast. Each method here has been tested by real remote workers and road tested across dozens of countries.
In a Nutshell
- Start with an audit of your tech. Lay out every cable, charger, adapter, and accessory you own. Remove duplicates and anything you have not used in the past 30 days. This single step can reduce your gear load by 20% to 40%.
- Use a dedicated tech pouch or organizer. A single pouch with elastic loops, zippered pockets, and mesh compartments keeps all your daily use items visible and accessible. This one change eliminates most cable tangling.
- Switch to universal USB C cables and multi port chargers. Most modern devices now charge over USB C. Replacing device specific cables with two or three universal cables cuts bulk and weight significantly.
- Label and color code everything. Use small colored cable ties or washi tape to mark each cable by device or function. You will grab the right cable on the first try every time.
- Create a “daily use” and “deep storage” system. Keep items you need every day in a quick access pouch. Store backup items and rarely used adapters in a separate deeper compartment. This two tier system speeds up your daily routine.
- Build a packing routine you repeat every time. Give every item a fixed home in your bag. When you pack the same way each time, you will notice immediately if something is missing.
Why Tech Organization Matters for Digital Nomads
Digital nomads depend on their technology to earn a living. A missing charger or a broken cable is not just an inconvenience. It can mean a missed deadline, a dropped client call, or hours spent searching for a replacement in an unfamiliar city.
Disorganized tech also causes physical damage. Loose cables get crimped. Earbuds get crushed. Power banks bump against laptop screens. Over time, this wear and tear adds up and shortens the life of expensive gear. Replacing a damaged external SSD on the road in a foreign country is both costly and time consuming.
There is also a mental cost. Clutter creates decision fatigue. Every time you open a messy bag and hunt for the right adapter, your brain burns a small amount of energy. Multiply that across dozens of daily interactions with your gear, and it drains focus you could spend on actual work.
Organized tech means faster setups, smoother transitions between locations, and lower stress. Many experienced digital nomads say that a clean tech system was the single biggest quality of life improvement they made after their first year on the road. The good news is that getting organized does not require expensive gear or complicated systems. It requires a clear method and the discipline to follow it.
Step 1: Audit and Declutter Your Current Tech Gear
Before you buy a single organizer, dump everything out. Lay every tech item you own on a flat surface. This includes cables, chargers, adapters, dongles, USB drives, SD cards, power banks, earbuds, and any other accessory.
Now sort them into three groups. Group one is daily essentials: items you use every single day. Group two is occasional use: items you need a few times per week or only in certain situations, like international power adapters. Group three is redundant or broken: items that duplicate something else or no longer work.
Be honest during this step. Many nomads carry three or four cables that do the same thing. Others hold onto adapters for devices they no longer own. Remove everything in group three immediately. Donate it, recycle it, or leave it behind.
This audit is the foundation of your entire organization system. You cannot organize chaos. You can only organize a reasonable number of items. Most digital nomads find they can eliminate 20% to 40% of their tech accessories during this first pass.
Pros: Immediate reduction in weight and bag clutter. Free. Takes less than 30 minutes.
Cons: Requires honest self assessment. You may feel reluctant to part with “just in case” items.
Step 2: Switch to Universal Cables and Multi Port Chargers
One of the fastest ways to reduce cable clutter is to standardize your charging setup. USB C has become the universal standard for most laptops, phones, tablets, and accessories. If your devices support USB C, you can replace a tangle of different cables with just two or three identical ones.
A multi port GaN (gallium nitride) charger can replace three or four separate wall adapters. These compact chargers offer multiple USB C ports and sometimes a USB A port in a single unit smaller than a traditional laptop brick. Many now deliver up to 65W or even 100W, which is enough to charge a laptop and a phone at the same time.
Pair your multi port charger with a single universal travel adapter that covers US, EU, UK, and AU plug types. This eliminates the need to carry multiple plug converters. One wall adapter, one multi port charger, and two to three cables can cover all your charging needs.
This consolidation step often cuts your cable count in half. Fewer cables means less tangling, less weight, and fewer things to lose.
Pros: Dramatic reduction in cable count and charger bulk. Simplifies packing. GaN chargers are lightweight and powerful.
Cons: Higher upfront cost for a quality GaN charger. Older devices may still require USB A or proprietary cables.
Step 3: Choose the Right Tech Organizer Pouch
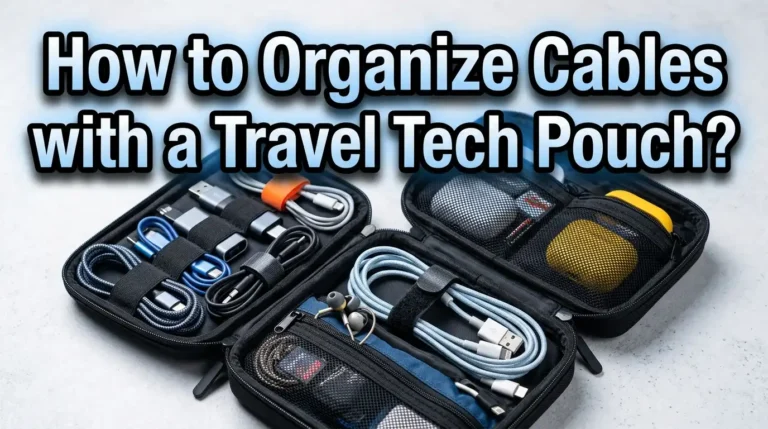
A dedicated tech pouch is the single most important physical tool for keeping your accessories organized. The ideal pouch opens flat or wide, so you can see everything inside at a glance. It should have elastic loops for cables, mesh pockets for small items, and zippered compartments for things like SD cards or USB drives.
Size matters. If you carry only a charger, two cables, earbuds, and a power bank, a small pouch works. If you carry adapters, a portable mouse, a USB hub, and a portable SSD, you need a medium or large pouch. Pick a size that fits your actual gear with a little room to spare, but not so much room that items shift around during transit.
Look for pouches made from water resistant material. Spills happen in backpacks, and a little water resistance protects your gear. Semi rigid pouches offer the best balance between protection and packability. They absorb bumps without adding too much bulk.
Avoid pouches with only open compartments. Without loops, dividers, or pockets, your cables and accessories will end up in a jumbled pile at the bottom, and you are back to square one.
Pros: Keeps everything visible and accessible. Protects gear from bumps and moisture. Portable and easy to grab from a larger bag.
Cons: Adds a small amount of weight and bulk. Cheap pouches wear out fast and may lack proper organization features.
Step 4: Use Cable Ties, Clips, and Wraps
Even inside a well organized pouch, cables can tangle if they are loose. The fix is simple: wrap every cable before you store it. Velcro cable ties are the most popular choice among frequent travelers. They are reusable, gentle on cables, and fast to apply and remove.
The best wrapping technique is the “over under” coil. Instead of wrapping a cable around your hand in the same direction (which creates twists), alternate the direction of each loop. This method prevents kinks and lets the cable uncoil flat when you need it.
Short silicone cable ties are another option. They snap around a coiled cable and hold it in place. Some nomads prefer simple binder clips or even small rubber bands, though rubber bands can degrade and stick to cables over time.
For earbuds and thinner cables, a small zippered mesh bag or a dedicated earbud case keeps them from tangling with larger items. The key rule is simple: never put a loose cable back into your pouch or bag. Coil it, wrap it, and then store it. This habit takes five seconds and saves five minutes of untangling later.
Pros: Prevents tangling and cable damage. Velcro ties are cheap, reusable, and lightweight. Easy to build into a daily habit.
Cons: Adds a few seconds to your packing routine. Requires you to remember to coil cables consistently.
Step 5: Label and Color Code Your Cables
When all your cables are black and roughly the same length, it is hard to tell them apart at a glance. Color coding solves this problem instantly. You have a few options.
Colored velcro ties are the simplest method. Assign a color to each cable type or device. For example, use red ties for your laptop charging cable, blue for your phone cable, and green for your data transfer cable. You can also use small strips of colored washi tape wrapped around each cable end.
Another approach is to buy cables in different colors. Many USB C cables now come in white, blue, green, orange, and other colors. If you plan to carry three USB C cables for different devices, buying each in a different color makes identification instant.
For adapters and dongles, a small label maker or a strip of masking tape with a handwritten note works well. Write what the adapter connects to directly on the tape. This is especially useful for international power adapters that all look similar.
Color coding and labeling take about 10 minutes to set up, and the time savings compound daily. You will never again hold up a cable and wonder, “Wait, is this the one for my laptop or my power bank?”
Pros: Speeds up cable selection dramatically. Low cost. Easy to implement. Reduces daily frustration.
Cons: Labels can peel off over time and may need replacement. Requires a consistent color system you remember.
Step 6: Create a Two Tier Packing System
Experienced digital nomads split their tech into two layers: daily access and deep storage. Your daily access tier holds everything you use every workday. This includes your charging cable, earbuds, phone charger, and power bank. These items go in your primary tech pouch, which stays in the most accessible part of your bag.
Your deep storage tier holds items you need less often. International adapters for specific countries, backup cables, an extra power bank, a USB hub, or a portable keyboard fall into this category. These go in a separate pouch or a zippered compartment deeper in your bag.
This system works because it reduces how much you dig through your bag during a normal workday. You grab your daily pouch, set up at a coworking space or cafe, and everything you need is in one place. Your backup gear stays packed and protected until you actually need it.
If you travel with carry on only, this two tier system also helps at airport security. You can pull out your daily tech pouch quickly for screening without disturbing the rest of your bag.
Pros: Speeds up daily setup and pack down. Protects backup gear from unnecessary handling. Makes airport security faster.
Cons: Requires two pouches or designated compartments. Takes discipline to return items to the correct tier after use.
Step 7: Assign a Fixed Home for Every Item
This is the organizational principle that holds everything together. Every single tech accessory should have one specific spot in your bag or pouch. Your laptop charger always goes in the left mesh pocket. Your earbuds always go in the top zippered compartment. Your power bank always goes in the right elastic loop.
When every item has a fixed home, two things happen. First, you find things instantly because muscle memory takes over. Second, you notice immediately when something is missing. If the left mesh pocket is empty, you know your charger is still plugged in at the cafe you just left.
This “a place for everything” approach is used by military personnel, surgeons, and professional photographers for exactly the same reason. It eliminates search time and prevents loss.
The key is to resist the urge to “just toss it in” when you are in a hurry. Take the extra three seconds to put each item back in its designated spot. This habit pays enormous dividends over weeks and months of travel.
Pros: Eliminates search time. Prevents leaving items behind. Builds a reliable routine.
Cons: Requires initial setup time to decide where each item goes. Demands consistent follow through.
Step 8: Protect Your Gear From Physical Damage
Organized tech is useless if it is broken. Digital nomads move constantly, and their gear takes a beating from buses, trains, planes, tuk tuks, and motorbike rides. Protection matters.
For your laptop, a padded sleeve inside your main bag is essential. Even backpacks with built in laptop compartments benefit from an extra layer of protection. A neoprene sleeve absorbs shocks and protects against minor bumps.
For smaller accessories, your tech pouch provides the first line of defense. If you carry a portable SSD or hard drive, consider a small hard shell case specifically for that item. External drives are fragile and do not respond well to impacts.
Cables benefit from proper coiling (no tight kinks) and storage in elastic loops. A cable that is consistently bent at a sharp angle will eventually develop an internal break. The same applies to earbuds. Never wind them tightly around a phone or player. Use a small case instead.
Finally, keep tech away from liquids. Store your tech pouch in a water resistant bag or line your backpack with a dry bag liner if you travel in rainy climates. A single coffee spill can destroy hundreds of dollars of gear.
Pros: Extends the life of expensive equipment. Prevents data loss from damaged drives. Reduces replacement costs.
Cons: Protective cases add weight and bulk. Hard cases take up more space than soft storage.
Step 9: Build a Pre Departure Checklist
A checklist sounds basic, but it is one of the most effective tools against leaving gear behind. Create a short list of every tech item you carry and review it each time you leave a hotel, coworking space, or cafe.
Your checklist should be stored on your phone as a note or in a simple checklist app. A physical card in your tech pouch works too. The list does not need to be long. Most digital nomads can fit their entire tech inventory in 10 to 15 items.
Review the list before you zip up your bag and walk out the door. This 30 second habit catches forgotten chargers, earbuds left on a table, and adapters still plugged into a wall outlet. Experienced nomads say that this single habit saved them from losing gear multiple times.
It is also smart to take a quick photo of your full gear spread at the start of each trip. This photo serves as a visual reference and doubles as documentation for insurance claims if anything is lost or stolen.
Pros: Prevents loss of valuable gear. Takes less than a minute. Works in any situation.
Cons: Requires you to remember to actually use the checklist. Easy to skip when you are rushing.
Step 10: Plan for Redundancy on Critical Items
When your income depends on technology, losing a single item can create a serious problem. Smart nomads carry one backup for each critical item. This does not mean doubling your entire kit. It means identifying the items that would stop you from working if they failed.
A backup charging cable, a second power bank, and a spare pair of earbuds cover most emergencies. If you depend on a portable hotspot, carry a local SIM card as a backup internet source. If your work requires external storage, carry a second drive or use cloud backup.
The goal is not to carry everything in duplicate. The goal is to ask: “If this one item breaks or gets lost today, can I still work tomorrow?” If the answer is no, carry a spare.
Store backups in your deep storage tier, separate from your daily use items. This protects them from wear and ensures they are fresh and functional when you need them.
Pros: Protects your ability to work during emergencies. Provides peace of mind. Backups for cables and earbuds are lightweight.
Cons: Adds some weight and takes up space. You may carry backups for months without needing them.
Step 11: Manage Power Effectively Across Time Zones
Digital nomads move between countries with different electrical systems. A good power management strategy saves time and prevents damage to your devices.
Start with a universal travel adapter that supports at least the four major plug types: US, EU, UK, and AU. Pair this with your multi port GaN charger so you only need one adapter for all your devices. Keep the adapter and charger together in your daily access pouch.
Learn the voltage standards of each country you visit. Most modern electronics are dual voltage (100V to 240V), but some older devices are not. Check the small print on each charger before plugging it into a foreign outlet. A voltage mismatch can fry your device instantly.
Carry a power bank with enough capacity to charge your phone at least twice. A 20,000 mAh bank covers most needs for a full day away from outlets. If you work long hours in cafes with limited outlets, a power bank is not optional. It is essential.
Pros: One universal adapter replaces multiple country specific plugs. Power banks provide independence from wall outlets.
Cons: Universal adapters can be bulky. High capacity power banks are heavy and may face airline restrictions above 100Wh.
Step 12: Use Cloud Storage to Reduce Physical Accessories
Every USB drive and external hard drive you carry is a physical item that takes up space and can be lost or damaged. Cloud storage reduces your dependence on physical media and simplifies your kit.
Upload important files, project backups, and documents to a reliable cloud service. Set up automatic syncing on your laptop so your latest work is always backed up. This means that even if you lose your external drive, your files are safe.
For photographers and videographers who work with large files, a hybrid approach works well. Keep your active project files on a portable SSD and archive completed projects to the cloud whenever you have a strong internet connection.
Cloud storage also eliminates the need to carry multiple USB drives for file sharing. You can share files through cloud links instead. This removes one more category of small, easy to lose accessories from your bag.
Pros: Reduces physical items to carry. Protects against data loss from theft or damage. Access files from any device.
Cons: Requires reliable internet access. Monthly subscription costs. Large uploads are slow on poor connections.
Step 13: Review and Update Your System Regularly
Your tech needs change over time. You buy new devices, drop old ones, visit new regions, and adjust your work style. Review your entire tech kit every three to six months. Remove items you no longer use and add items that fill new needs.
During each review, check the condition of your cables, chargers, and pouches. Frayed cables are a fire risk and should be replaced immediately. Worn out velcro ties lose their grip and should be swapped for fresh ones. Pouches with broken zippers need replacement before they fail completely during transit.
This periodic review also helps you spot trends. Maybe you carried a portable keyboard for six months but never used it. Maybe you need a longer cable for certain coworking setups. Each review makes your system leaner and more effective.
Keep a short note on your phone about what worked and what did not since your last review. This running log helps you make better decisions each time you update your kit.
Pros: Keeps your system current and lean. Catches worn or damaged items before they fail. Improves your setup over time.
Cons: Takes 30 to 60 minutes every few months. Requires honest self evaluation about what you actually use.
Common Mistakes Digital Nomads Make With Tech Organization
Even with a good system, some habits can undo your efforts. The most common mistake is buying too many organizers. One or two well chosen pouches beat five different cases that spread your gear across your entire bag.
Another frequent mistake is failing to return items to their designated spot. You unplug your charger and toss it into the main compartment “just this once,” and within a week, your system has collapsed. Consistency is the entire point.
Over packing “just in case” items is another trap. If you did not use an adapter or dongle in the past three months, you probably do not need it. The weight of unused tech adds up fast, and every extra gram matters when you live out of a backpack.
Finally, many nomads neglect cable maintenance. Cables that are bent sharply, coiled too tightly, or stored under heavy items develop internal breaks. Handle cables gently, coil them properly, and replace them at the first sign of wear.
Pros of avoiding these mistakes: Lighter bag, longer lasting gear, and a system that actually works long term.
Cons of ignoring them: Wasted money, lost items, broken gear, and constant frustration.
Frequently Asked Questions
What is the best type of tech pouch for digital nomads?
The best tech pouch opens flat or clamshell style so you can see all your items at once. Look for one with elastic loops, mesh pockets, and zippered compartments. It should be semi rigid to protect your gear and made from water resistant material. Choose a size that fits your daily carry items with a small amount of extra room, but avoid oversized pouches that let items shift and tangle. Many experienced nomads prefer medium sized pouches that measure roughly 25cm by 15cm.
How many cables should a digital nomad carry?
Most digital nomads can get by with two to three USB C cables and one backup. If you still use a device that requires USB A or a proprietary connector, add one cable for that device. The goal is to standardize on USB C as much as possible and use a multi port charger to reduce wall adapters to a single unit. Fewer cables means less tangling, less weight, and less confusion.
How do I stop cables from tangling in my bag?
Use velcro cable ties or silicone clips to wrap each cable before you store it. Use the “over under” coiling method to prevent twists. Store each wrapped cable in its own elastic loop or mesh pocket inside your tech pouch. The single most important rule is to never put a loose cable back into your bag. Five seconds of wrapping saves five minutes of untangling.
Should I use ziplock bags for tech accessories?
Ziplock bags are a cheap and effective option, especially for waterproofing. They work well for small items like SD cards, USB drives, and international SIM cards. They are also useful as an emergency rain cover for electronics. However, ziplock bags do not offer impact protection, and they wear out after a few uses. They work best as a supplement to a proper tech pouch rather than a replacement.
How do I keep my tech safe in hostels and shared spaces?
Never leave tech unattended in shared rooms. Use a small cable lock to secure your laptop to a fixed object when you step away. Keep your tech pouch and valuables in a daypack that stays with you. Many nomads also use a portable safe or a locking compartment in their main backpack. A basic laptop lock and awareness of your surroundings go a long way in preventing theft.
How often should I update my tech organization system?
Review your entire setup every three to six months. Check for worn cables, broken zippers, and items you no longer use. Remove anything redundant and replace anything damaged. Your needs change as you acquire new devices or shift your work style, so a regular review keeps your system efficient and current.
Hi, I’m Janica! I’m a travel enthusiast with a passion for finding gear that actually works on the road. After years of overpacking and dealing with gear that didn’t live up to the hype, I started Pack Light to help fellow travelers make smarter choices. I test, compare, and review travel products so you don’t have to waste money on the wrong gear.