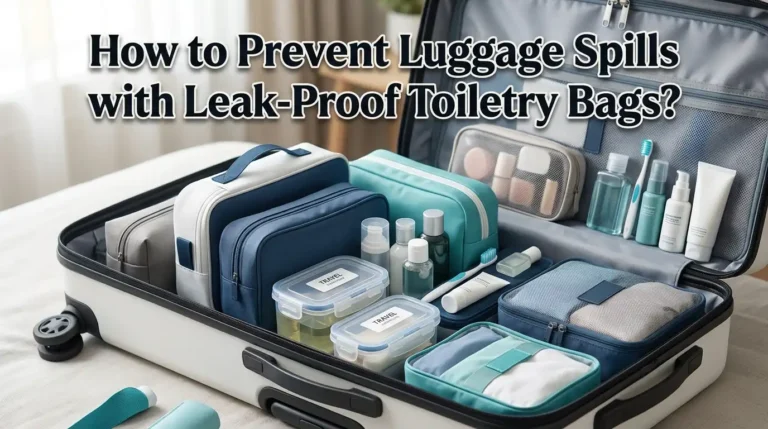
How to Organize Cables with a Travel Tech Pouch?
A tangled pile of cables is one of the most common and frustrating problems travelers face. Studies show the average person now carries at least three to five charging cables and accessories on any given trip.
That number keeps growing as we add smartwatches, wireless earbuds, tablets, and portable batteries to our daily loadout.
The good news is that a travel tech pouch can solve this problem completely. A well organized tech pouch turns cable chaos into a system where every cord, charger, and adapter has its own place.
This guide will walk you through every step of organizing your cables with a travel tech pouch. You will learn how to choose the right pouch, sort your cables, pack everything efficiently, and keep your setup working perfectly trip after trip.
Key Takeaways
- Start by decluttering your cable collection. Remove any broken, outdated, or duplicate cables before you even think about a pouch. Most people carry 30% to 50% more cables than they actually need. A lean collection is the foundation of good organization.
- Choose a tech pouch that matches your gear and travel style. A minimalist weekend traveler needs a very different pouch than a digital nomad carrying a laptop, tablet, and camera. Look for elastic loops, mesh pockets, and multiple compartments that keep items separated and visible.
- Group cables by device or function, not randomly. Sorting cables into categories like “charging,” “data transfer,” and “audio/video” makes them faster to find. Pair each cable with its related charger or adapter in the same section of your pouch.
- Use the rolling method for short cables and the fold and wrap method for longer ones. Rolling prevents kinks and saves space. Folding with a velcro strap works better for longer cables that could be damaged by tight loops.
- Invest a few minutes in labeling. Color coded velcro ties, small cable tags, or even a strip of masking tape with a quick note can save you ten minutes of searching every time you need a specific cable.
- Review and update your pouch setup every month. Your devices change, your cables wear out, and your travel needs shift over time. A quick monthly check keeps your system fresh and ready to go.
Why Tangled Cables Are a Real Problem for Travelers
Cable tangling is more than a small annoyance. It is a genuine time waster and a source of damage to expensive accessories. When cables are shoved loosely into a bag, they wrap around each other, creating knots that stress the internal wiring. This leads to fraying, broken connectors, and shortened cable life.
The average traveler spends several minutes per trip just searching for the right cable. Multiply that across dozens of trips per year, and you lose hours to something completely preventable. Tangled cables also create a poor impression in professional settings. Pulling a messy knot of wires out of your bag during a business meeting does not inspire confidence.
Loose cables are also easy to lose. Small adapters, USB sticks, and earbuds slip to the bottom of bags and vanish. Replacing these items adds up over time, both in money and in the frustration of being caught without something you need.
A travel tech pouch eliminates all of these problems by giving each item a dedicated spot. Cables stay separated, protected, and easy to find. The result is faster packing, faster access, and longer lasting gear.
What Is a Travel Tech Pouch and How Does It Work
A travel tech pouch is a compact, structured bag designed to hold cables, chargers, adapters, power banks, and small electronics. Unlike a regular zippered bag, a tech pouch has internal organization features like elastic loops, mesh dividers, zippered pockets, and padded compartments.
Most tech pouches open flat or in a clamshell design. This layout lets you see everything inside at a glance, so you never have to dig through layers of tangled cords. The elastic loops hold individual cables in place. The mesh pockets contain small accessories like SIM cards, memory cards, or USB adapters. The larger compartments fit power banks and charging bricks.
Tech pouches come in many sizes. Compact models fit in a jacket pocket and hold a couple of cables and a small charger. Medium pouches handle the full loadout of a typical traveler. Large organizers can store a tablet, a laptop charger, and a dozen accessories.
The key principle is simple. Every item gets its own slot. This prevents tangling, makes items easy to find, and protects gear from scratches and damage. A good tech pouch turns a random pile of cables into a system you can rely on.
How to Choose the Right Travel Tech Pouch for Your Needs
Choosing the right pouch depends on three factors: how much gear you carry, how often you travel, and what kind of protection you need. Getting the right fit matters because a pouch that is too small forces you to cram things in, and a pouch that is too large wastes space in your bag.
Start by counting your items. Lay out everything you typically travel with: phone charger, laptop charger, power bank, earbuds, USB cables, adapters, and anything else. This gives you a clear picture of the size and number of compartments you need.
Material matters a lot. Nylon and Cordura are durable, lightweight, and resist water. Polyester works for lighter use. If you travel in rough conditions or pack your bag tightly, look for reinforced stitching and water resistant zippers. A soft interior lining protects screens and delicate connectors.
Pros of compact pouches: lightweight, fits in small bags, forces you to pack only the essentials. Cons of compact pouches: limited space, not suitable for bulky chargers.
Pros of large organizers: holds everything, lots of compartments. Cons of large organizers: heavier, takes more bag space.
Look for a pouch with a mix of elastic loops, mesh pockets, and at least one zippered compartment for tiny items. A flat opening design is much easier to use than a deep, single compartment bag.
Step 1: Declutter Your Cable Collection Before You Start
The most important step in organizing your cables happens before you even touch a pouch. You need to remove every cable, charger, and adapter you own and sort them into three piles: keep, maybe, and discard.
Start with the discard pile. Any cable with a frayed end, a bent connector, a cracked housing, or an intermittent connection needs to go. These cables are not just useless; they can damage your devices or even pose a safety risk. Old cables that fit devices you no longer own should also go into this pile.
The maybe pile is for cables you rarely use but might need in specific situations. A micro USB cable for an old backup phone, a specialty adapter for a conference room projector, or an extra long cable for hotel rooms are all examples. Keep these in a separate bag at home, not in your travel pouch.
The keep pile should contain only the cables and accessories you use on every trip or most trips. For many travelers, this includes a USB C cable, a Lightning cable if you have Apple devices, a wall charger, a power bank, and earbuds. That is it. Five to eight items cover the needs of most people.
This decluttering step usually cuts the average cable collection in half. The result is a lighter, more organized pouch that actually works.
Step 2: Group Your Cables by Device or Function
Once you have your trimmed down collection, the next step is to organize cables into logical groups. This is the secret to finding what you need in seconds instead of minutes.
There are two main approaches. The first is grouping by device. Put your phone charger and cable together. Put your laptop charger and any related adapters together. Put your earbuds and their charging cable together. This method works well if you always use the same devices.
The second approach is grouping by function. Put all charging cables in one section. Put all data transfer cables in another. Put all audio and video cables in a third section. This method works better if you swap devices frequently or share cables between multiple gadgets.
Both methods have clear benefits. Grouping by device is faster when you need to grab everything for one gadget. Grouping by function is more efficient when multiple devices share the same cable type, like USB C.
Pros of device grouping: intuitive, quick access, nothing gets forgotten. Cons of device grouping: can lead to duplicate cables if devices share the same type.
Pros of function grouping: fewer total cables, flexible across devices. Cons of function grouping: slightly slower to grab a complete device kit.
Pick the method that matches your habits and stick with it. Consistency is what makes the system work.
Step 3: Master Cable Coiling and Wrapping Techniques
How you wrap your cables determines whether they stay organized or turn into a tangled mess within minutes. There are three proven techniques that protect your cables and save space inside your pouch.
The first is the basic loop and wrap method. Hold one end of the cable and make loose loops about four inches in diameter. When you reach the other end, wrap the last few inches around the center of the loops to hold everything together. This works great for short to medium cables and is the fastest technique.
The second is the over under method, also called the roadie wrap. Audio and video professionals have used this technique for decades. You alternate the direction of each loop, which prevents the cable from developing a twist memory. This is ideal for longer cables and thicker cords that tend to hold their shape.
The third is the figure eight wrap. Wrap the cable in a figure eight pattern around your fingers, then fold it in half and secure it with a velcro tie. This method is compact and works well for very long cables.
Pros of the basic loop: fast, simple, good for short cables. Cons: can create kinks in longer cables over time.
Pros of the over under method: prevents twisting, extends cable life. Cons: takes a bit more time to learn.
After wrapping, secure each cable with a small velcro strap or a silicone band. Rubber bands work in a pinch but can leave sticky residue over time.
Step 4: Pack Your Pouch with a Logical Layout
A great layout makes your pouch work like a toolkit instead of a junk drawer. The goal is to place items so that the things you use most are the easiest to reach.
Start with the largest items. Put your power bank and wall charger in the main compartment or the back section. These heavy items sit best at the base of the pouch where they provide stability. If your pouch opens flat, place them on the side closest to the spine.
Next, fill the elastic loops with your wrapped cables. Place your most used cable in the most accessible loop. For most people, this is the phone charging cable. Less frequently used cables can go in deeper or side positions.
Small accessories like SIM card tools, memory cards, USB adapters, and cable tips belong in zippered mesh pockets. These tiny items vanish if left loose, so a sealed pocket is essential.
If your pouch has a front pocket or quick access panel, reserve it for the one or two items you grab most often. A short charging cable and a pair of wireless earbuds are common choices for this spot.
The rule of thumb is simple. Frequency of use determines position. Daily items go on top or in front. Weekly items go in the middle. Rarely used items go in the back or deepest compartments.
How to Organize Cables for Different Travel Scenarios
Your packing strategy should change based on the type of trip. A weekend getaway requires a very different setup than a two week international business trip.
For short trips of one to three days, go minimal. One charging cable, one wall charger, a power bank, and earbuds are usually enough. Use a compact pouch and skip the extras. This keeps your bag light and your pouch easy to manage.
For business travel, add a laptop charger, an HDMI cable or adapter for presentations, and possibly a USB hub. A medium sized pouch with dedicated compartments handles this loadout well. Keep the presentation cable in a quick access pocket so you are ready for meetings.
For international travel, you need outlet adapters for the countries you are visiting. A universal travel adapter saves space compared to carrying multiple regional plugs. Pack it near your wall charger so the two are always together.
For long term travel or digital nomad setups, consider a larger pouch or even two pouches: one for daily essentials and one for backup gear. This separation keeps your daily pouch slim while ensuring you have spares for emergencies.
The key principle across all scenarios is to pack only what you will actually use. Every extra cable adds weight, takes space, and creates more potential for tangling.
Labeling and Color Coding: The Secret to Fast Access
Labels are one of the most underrated organization tools for travel tech. When you carry multiple cables that look nearly identical, a small label saves you from guessing and squinting at tiny connectors.
The simplest method is colored velcro ties. Assign a color to each device or cable type. Blue for your phone. Red for your laptop. Green for your tablet. You can spot the right cable instantly without unrolling it.
Cable tags are another effective option. These small plastic or silicone tags clip onto the cable near the connector end. Write the device name or cable type with a permanent marker. Tags like “Phone USB C” or “Laptop 65W” make identification instant.
For a budget approach, wrap a small piece of masking tape or washi tape around the cable and write on it. This costs almost nothing and takes seconds. Replace the tape when it gets worn.
If you want a digital backup, keep a simple note on your phone listing what is in your pouch and where it goes. This is especially helpful after a trip when you are repacking and want to make sure nothing is missing.
Pros of color coding: instant visual identification, no reading required. Cons: requires buying colored ties and maintaining a consistent system.
Pros of written labels: very specific, no color memory needed. Cons: harder to read in dim light, labels can wear off.
Common Mistakes People Make When Organizing a Tech Pouch
Even with a good pouch and good intentions, several common mistakes can undermine your organization system. Knowing these pitfalls helps you avoid them from the start.
The first mistake is overpacking. People stuff their pouch with every cable they own “just in case.” This creates the same tangled mess the pouch was supposed to prevent. Pack only what you will use on this specific trip. Leave the rest at home.
The second mistake is ignoring compartments. Many people open their pouch and shove everything into the main section without using the elastic loops, mesh pockets, or dividers. This defeats the entire purpose of the pouch design. Every compartment exists for a reason. Use them.
The third mistake is wrapping cables too tightly. Tight wraps create kinks and stress points that weaken the internal wiring over time. Use loose, gentle loops instead. Your cables will last much longer.
The fourth mistake is never cleaning out the pouch. Old cables, dead batteries, and forgotten adapters accumulate over time. Set a monthly reminder to empty the pouch, check each item, and remove anything you no longer need.
The fifth mistake is using the wrong pouch size. A pouch that is too small forces you to cram things. A pouch that is too large lets items shift and tangle during travel. Match your pouch to your actual gear, not to what you might carry someday.
DIY Alternatives and Budget Friendly Cable Organization
You do not need an expensive tech pouch to organize your cables effectively. Several budget friendly alternatives work surprisingly well for travelers who want to start simple.
Clear zippered makeup bags are a popular choice among frequent travelers. They are cheap, durable, and transparent, so you can see everything inside without opening them. Buy two or three small ones and sort cables by category. The transparency factor makes these bags especially useful for quick identification at airport security.
A small pencil case or pencil roll with elastic loops can hold several cables neatly. These are widely available and often cost very little. The roll design lets you see all your cables at once when you unfold it.
Binder clips and small carabiners can keep wrapped cables together and attach them to the inside of a bag. Pill organizer boxes work for tiny adapters, SIM cards, and SD cards. Sunglasses cases provide padded protection for a power bank and a short cable.
Pros of DIY alternatives: very low cost, easy to find, customizable. Cons: less durable, fewer compartments, may not protect gear as well as a dedicated pouch.
Pros of a dedicated tech pouch: purpose built design, better protection, longer lasting. Cons: higher cost, takes time to find the right one.
Even if you plan to buy a proper tech pouch later, these DIY solutions let you start organizing your cables today with items you probably already have at home.
Caring for Your Cables to Extend Their Life
Organization is not just about neatness. It is also about protecting your investment. Quality cables cost real money, and proper care can double or triple their usable life.
The most important rule is to avoid sharp bends. When a cable bends at a sharp angle near the connector, the internal wires fatigue and eventually break. This is the number one cause of cable failure. Always coil cables in gentle loops and never yank them out by the cord.
Store cables away from heat and direct sunlight. Excessive heat softens the insulation and weakens adhesives that hold connectors together. A tech pouch inside your bag provides a layer of protection against temperature swings.
Clean your cable connectors periodically. Dust and lint accumulate in USB ports and lightning connectors, causing poor connections and slow charging. A small brush or a blast of compressed air clears debris quickly.
When you notice a cable starting to fray near the connector, do not wait for it to fail completely. Replace it before it damages a device port. A fraying cable can short circuit or deliver inconsistent power, which is bad for your phone or laptop battery.
Velcro ties and silicone bands are gentler on cables than rubber bands, which can leave residue and constrict too tightly. Invest in a small pack of reusable velcro ties. They cost very little and make a noticeable difference in how long your cables last.
How to Maintain Your Tech Pouch Over Time
A tech pouch is not a set it and forget it solution. Your devices change, your cables wear out, and your travel habits shift. Regular maintenance keeps your system working smoothly.
Set a monthly reminder to do a full pouch review. Empty everything out. Inspect each cable for fraying, bent connectors, or loose housing. Check your power bank charge level. Test any adapters you have not used recently. Remove anything you no longer need and add anything new.
Wipe down the inside of the pouch with a damp microfiber cloth. Dust, crumbs, and lint accumulate over time. A clean pouch keeps your connectors clean and your cables in good condition.
After every trip, repack your pouch deliberately. It is tempting to shove everything back in quickly, but taking two minutes to rewrap cables and return items to their proper spots prevents the gradual slide back into chaos.
When you upgrade a device, immediately check whether your cable and charger setup needs to change. Switching from a phone that uses Lightning to one that uses USB C means your old cable is now dead weight in the pouch. Swap it out right away.
Keep a spare cable and a spare wall charger at home, ready to replace anything that fails. This way, you never leave for a trip with a gap in your setup.
Eco Friendly and Sustainable Cable Organization Options
Sustainability is an increasingly important factor for many travelers. Several environmentally conscious options exist for tech pouch organization.
Pouches made from recycled nylon, upcycled canvas, and organic cotton are now widely available. Some brands use zippers made from recycled plastic bottles and dyes that are free of harmful chemicals. These materials perform just as well as conventional options while producing less waste.
Cork fabric is an emerging option for tech pouches. It is lightweight, renewable, water resistant, and has a unique texture. Cork is harvested without cutting down the tree, making it one of the most sustainable materials available.
When your cables finally reach the end of their life, recycle them properly. Many electronics retailers and recycling centers accept old cables. Some municipalities have e waste collection events. Throwing cables in the regular trash puts metals and plastics into landfills unnecessarily.
Buying quality cables that last longer is also a sustainable choice. A well made braided cable that lasts three years produces less waste than three cheap cables that each last one year. The same principle applies to your pouch. A durable pouch made from quality materials will serve you for years.
Look for certifications like the Global Recycled Standard or OEKO TEX on product labels. These certifications verify that the materials and manufacturing processes meet specific environmental and safety standards.
Quick Reference: The Perfect Tech Pouch Packing Checklist
Before every trip, run through this quick checklist to make sure your tech pouch is ready to go. This list covers the essentials for most travelers and can be customized based on your specific devices and needs.
Charging essentials: wall charger with at least two ports, primary phone cable, secondary device cable, and a power bank with at least 10,000mAh capacity. These four items cover the core charging needs for any trip.
Connectivity extras: a universal travel adapter for international trips, a small USB hub if you need to connect multiple devices to a laptop, and any specialty cables for cameras or external drives.
Audio and display: wireless earbuds with their charging case, a short aux cable if you use wired headphones, and an HDMI or display adapter for presentations or hotel TVs.
Tiny essentials that get lost easily: SIM card ejector tool, a spare SIM card in a small case, micro SD cards, and USB flash drives. These all belong in a zippered mesh pocket where they cannot escape.
Wrapping and securing supplies: three to five velcro cable ties, a couple of small silicone bands, and any labels or color coded ties you use.
Run through this list, adjust it for your specific trip, and you will leave with confidence that your tech pouch has everything you need and nothing you do not.
Frequently Asked Questions
What should I look for in a travel tech pouch for international trips?
Look for a pouch with water resistant fabric, a secure zipper, and enough compartments to separate your cables, adapters, and chargers. Multiple elastic loops and mesh pockets help keep items visible and organized. Make sure the pouch has enough room for a universal travel adapter, which can be bulky. A flat opening or clamshell design lets you find items quickly during airport security checks or early morning hotel room scrambles.
How many cables should I actually carry in my tech pouch?
Most travelers need between four and seven cables. This typically includes a phone charging cable, a laptop charging cable, a cable for earbuds or a smartwatch, and one or two spare or specialty cables. Resist the urge to pack extras “just in case.” Every unnecessary cable adds weight and clutter. If multiple devices share the same cable type, carry one cable and use it for all of them.
What is the best way to prevent cables from tangling inside the pouch?
Use elastic loops and individual compartments to keep each cable in its own space. Wrap each cable using the basic loop method or the over under technique, and secure it with a velcro tie before placing it in the pouch. Never stuff loose, unwrapped cables into any compartment. The wrapping and separation are what prevent tangling. A pouch that opens flat also helps because items do not pile on top of each other.
Can I use a regular zippered bag instead of a dedicated tech pouch?
Yes, a clear zippered bag or a small toiletry bag can work as a starting point. The main downside is the lack of internal organization features like elastic loops and dividers. You can compensate by using small zip bags or velcro ties inside the main bag to create separation. However, a dedicated tech pouch will almost always provide a better experience because it is designed specifically for cables and electronics.
How often should I clean out and reorganize my tech pouch?
A monthly check is a good habit. Empty the pouch completely, inspect each item for damage, remove anything you no longer use, and wipe the inside of the pouch with a damp cloth. After every trip, take two minutes to rewrap cables and return items to their proper positions. This prevents the gradual buildup of clutter and keeps your system working at its best.
What are the best budget alternatives to an expensive tech pouch?
Clear makeup bags, pencil cases with elastic loops, small zippered pencil rolls, and even padded sunglasses cases all work well on a budget. You can also use small binder clips to keep cables together and pill organizer boxes for tiny adapters and memory cards. These alternatives lack the specialized design of a dedicated tech pouch, but they cost very little and are widely available at most stores.
Hi, I’m Janica! I’m a travel enthusiast with a passion for finding gear that actually works on the road. After years of overpacking and dealing with gear that didn’t live up to the hype, I started Pack Light to help fellow travelers make smarter choices. I test, compare, and review travel products so you don’t have to waste money on the wrong gear.